Resin printers
So you decided mini’s was your thing, huh? Well you are in the right place.
This is where we will compare information about different resin printers with their pros and cons so you can make a choice which printer you should get.
As with FDM printers it comes down to technical skill, time and of course money.
Most of the extra cost here adds features and resolution (more smooth prints) to the printer. We are going to go into details of what you can expect of the process, address resin concerns and look into different printers at different pricepoints
If you want to support the site and are considering buying the printers/resin/PPE, we do have affiliate links on the site to where you can buy them for no extra cost to you. We are not paid by the manufacturers for the recommendations, but are merely nerds like you.
Process
The process when working with resin printers is a bit more complicated than your regular FDM printer.
Usually with an FDM printer you have following steps to consider:
- Load filament (with automatic filament sensors you don’t have to worry about running out of filament mid print
- Bed adhesion – most of the time done with a combination of cleaning the print bed well with isopropyl alcohol and a warm print bed.
- That’s it. You are done. Most terrain nowadays gets printed without supports so you just pop it off the print bed and you can prime and paint the model.
With resin printers you have more steps and more things to look into:
- Make sure you have gloves on and a mask – see the concerns under the ventilations subsection underneath here.
- Load the chamber with resin and make sure you have enough for the print (you can get auto resin fillers but that’s more of a premium feature)
- Cleaning the model – letting it soak in hot water and a cleaning agent afterwards for a couple of minutes to get rid of excess resin. You can also buy a wash station.
- Removing supports from the miniature – doing it before the curing gets softer supports which makes it easier to remove
- Curing – either in a homemade UV box or with a curing station.
- Ventilating the area around the printer.
- Prime and paint.
Even with the extra steps, the quality you get out of a model is way better for monsters and player characters in your Dungeons and Dragons campaign or your bits for wargames, although when printing terrain its still way cheaper to do on an FDM printer.
By prepping for all the steps before hitting print, you set yourself up for victory.
Concerns
I’ll go into some of the concerns i hear most of the time when talking about a resin printer.
Printlines
In the early days of resin printing (and even more so in FDM prints) you have people focus on printlines. And it was warranted! When spending many hours painting a model, you want both the experience and the result to be worth it. With newer printers you usually get at least 4k resolution which eliminates most of the printlines and showcases most details.
Of course the higher resolution of the display emitting the light results in more crisp looking miniatures, but depending on your needs that might now be needed.
If you are a competition painter or are painting for display models, go spend a bit more and get better details, that’s a given. 8K printers today got little to no visible print lines and look close to injection molded models on sprues.
If you instead are a dungeon master in a Dungeons and Dragons campaign and just want some board ready miniatures on the battlemat most of the printlines when painted will be completely invisible 30 cm away from the miniature. Think of your needs as it is easy to spend more money, money that could be spend on more high quality models or more resin.
Ventilation/PPE
Okay, let’s start out with basics.
Resin is toxic. You want to avoid it getting on your skin and in your lungs. You want to wear gloves, you want to wear a mask that’s made specifically for organic vapours (you can find one from M3 by clicking here), and you want to ventilate the area when permitted.
There are two different approaches to handling the printer when its running. Enclosure or seperate room.
Enclosures can be DIY with 2 IKEA Lack tables on top of each other with mounted plexiglass sides, a small computer fan and a pipe leading out of the room to prevent fumes spreading. You just want to make sure both get rid of the fumes, but also keep a consistent temperature to avoid complications with the print.
You can also get more professional enclosures like this one but you are going to pay for it.
Another alternative is just having a seperate room for it or not use the room when in use. As long as you have a mask you can easily use the room if needed and ventilate after the print is over. But if you are living in an apartment or just got limited space, you definitely want to look into either building an enclosure or buy one.
Ease of use
If you are used to FDM printing, you know things can go wrong. If not, you need to expect things to go wrong. 3D printing is a skill that needs to be trained like anything else. Luckily we got a lot of resources online and we even got a Facebook group as a community with over 25.000 members currently which you can find >>here<<.
Overall, as long as you go in with an open mind, ready to troubleshoot and make sure you have a workspace that supports your printing, you will be fine.
Now lets look into some printers!
Printers
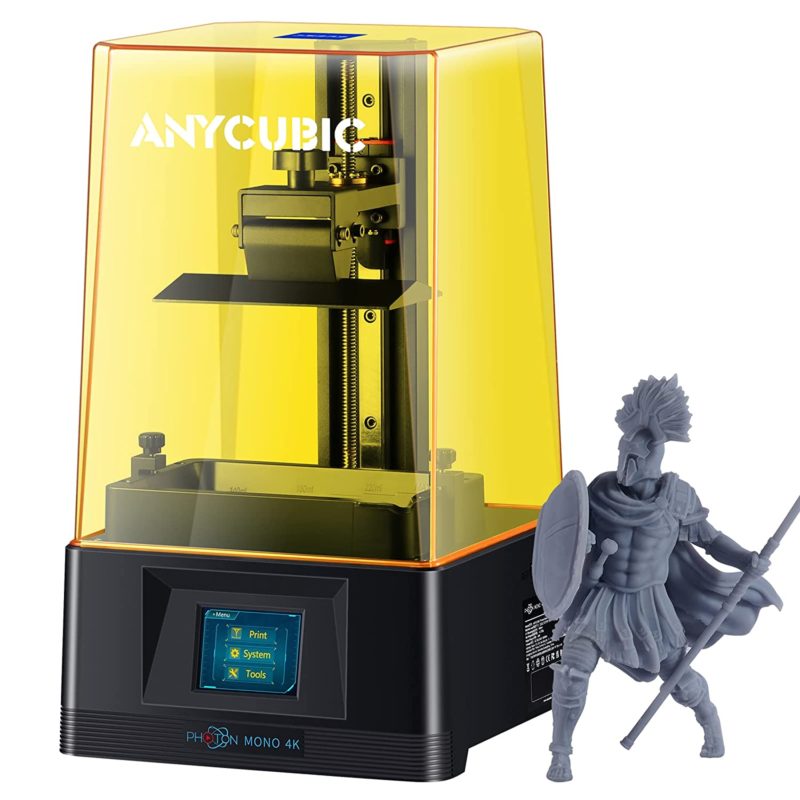
Anycubic Photon Mono 4k
One of the cheaper models which makes excellent board ready miniatures.
I would keep away from this if you are entering your paint jobs into competitions or are solely working on display models where you need an absolutely perfect eyeball so you can paint how the light subscatters on the surface of it.
If you are all about getting board-ready miniatures for your Dungeons and dragons game where its just important that its pretty from 30cm away, look no further.
This printer doesn’t come with a large build volume or extra features like auto-filling resin, but what it does is giving you a solid printer for the cost.
You can get it (depending on their offers) from $190 – $280
You can find it here on amazon
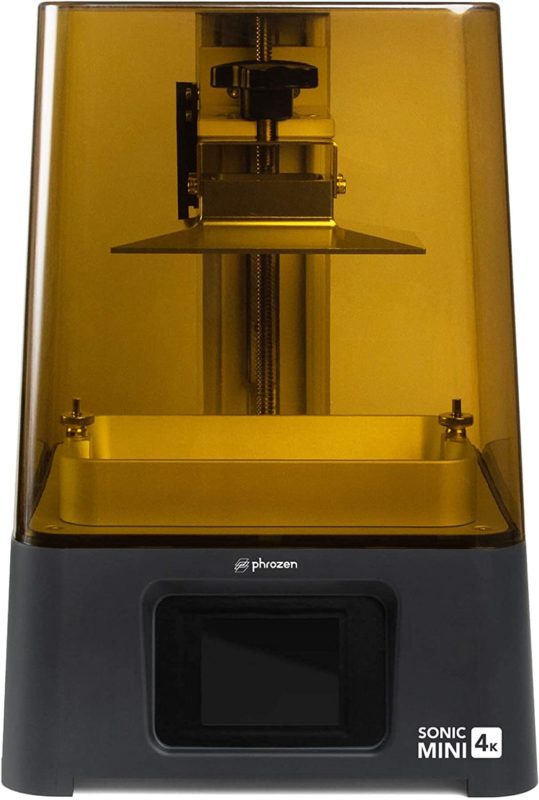
Phrozen Sonic Mini 4k
The phrozen sonic mini is Phrozens answer to the Anycubic Photon Mono 4k.
You can expect a solid printer that does the same as the mono 4k, albeit the build plate is a bit harder to clean.
Build volume wise you get a 13.2 x 7.4 x 13 cm, which is a bit on the lower side compared to the mono 4k (13.2 x 8 x 16.5 cm) but then you get DLP technology. The main difference between the LCD on the mono 4k and this, is that the Sonic Mini 4k got a projector underneath that projects light onto the buildplate for curing instead of having a physical LCD display underneath.
You will get a bit sharper resolution, but compared to higher resolution printers you can get, this printer fills a spot between them and the LCD models while still keeping the price low.
You can find it on amazon for $240 – $300 here.
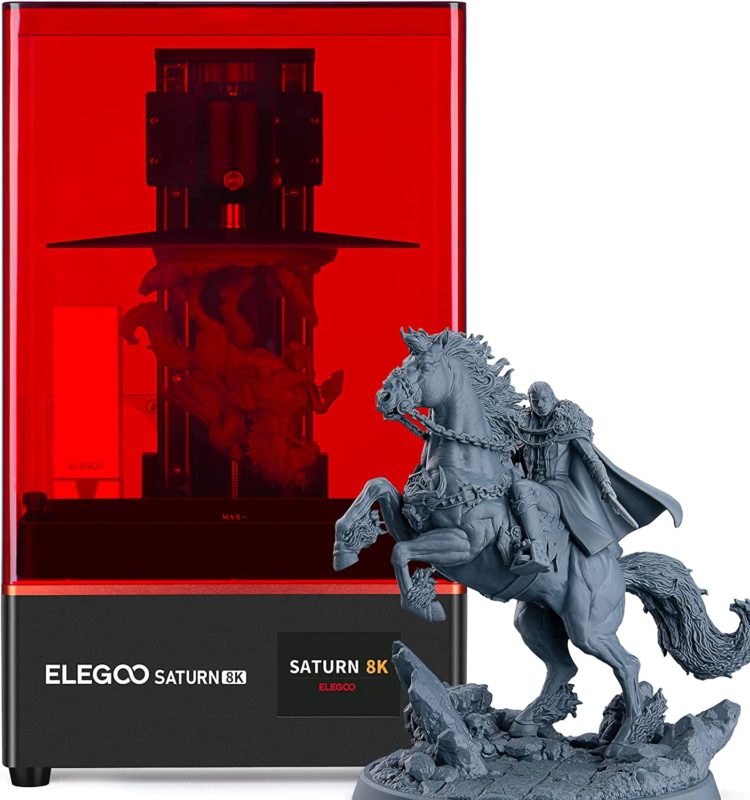
Elegoo Saturn 8k
So this is a step up from the regular 4k printers. If you want to print some really high quality models that can go for injection molding.
The prints comes out very crisp and you got a bit larger print volume compared to the mono 4k – 21.9 x 12.3 x 21.0 cm vs 13.2 x 8 x 16.5 cm but smaller than a M3 Max.
This printer is good if you want to get a 8k printer, but do not need a extremely large build volume. To set it in Dungeons and Dragons terms, you can expect a gargantuan model to be around 12 cm tall while a colossal being 24 cm tall.
When that is said, you can always resize your models to fit the build volume, so unless you are working on larger sculpts or extremely large miniatures, this should fit you well.
Considering that you can find this on amazon for $425-$560 its a bargain compared to the M3 Max
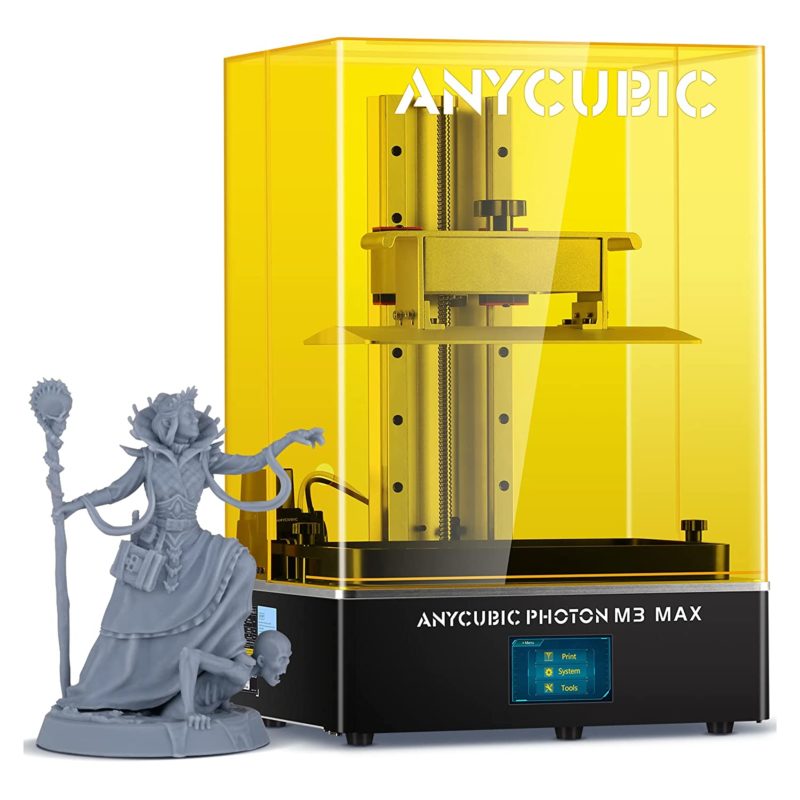
Anycubic Photon M3 Max
This one is both larger and have a better resolution compared to the mono 4k.
You get a larger printbed 30 x 29.8 x 16.4cm (up from 13.2 x 8 x 16.5 cm from the 4k) while also getting a 7K resolution display which means crisper looking miniatures.
If you need to work on larger sculpts which require a larger print bed, or just want to save time when printing, this is the printer for you.
It also features automatic resin feeding so you don’t run out of resin mid print.
It’s also more than 3 times the price of a mono 4k so that’s also something to keep in mind
You can find the printer on amazon for between $1000 – $1300 and by clicking here
Wash and Curing Stations
When looking for wash and curing stations, remember you can make your own. Just by foil lining a cardboard box and adding a bunch of UV LEDs on the inside, you have a cure box. By using a tub with hot water and soap, you have a wash station.
Although the different wash and cure stations comes with some features thats worth noticing. Most of the wash stations comes with a net that makes it easy to dunk your miniatures in it. Some of the curing stations comes with rotating plates so you save on having as many UV LEDs and also they come with transparent UV shielding around them so you can see your miniatures while they are being cured.
Remember this is more of a convinience than anything else and is not a requirement. If you want to get really pragmatic, you would be able to cure a miniature outside, by placing it in the sun.
But lets dive into the different models and look at some of the pros and cons.

Anycubic Wash And Cure
With the anycubic wash and cure you get a station that handles both the washing and curing on the same base.
This interchangable top saves desk place while making sure that your miniatures gets the post-processing it deserves. Just pop off the wash station and add the rotating disc and the top cover and you are ready for curing.
There is a small timer that tells you how much time is left and a motor that makes sure to splash the solution around in the wash bucket to make sure you get rid of all the excess resin.
Only downside is the small size of the interior, so if you got a larger build volume as from the Photon M3 Max or the Elegoo Saturn, you should get the plus model which is larger.
Personally my favorite of the bunch for a very affordable price.
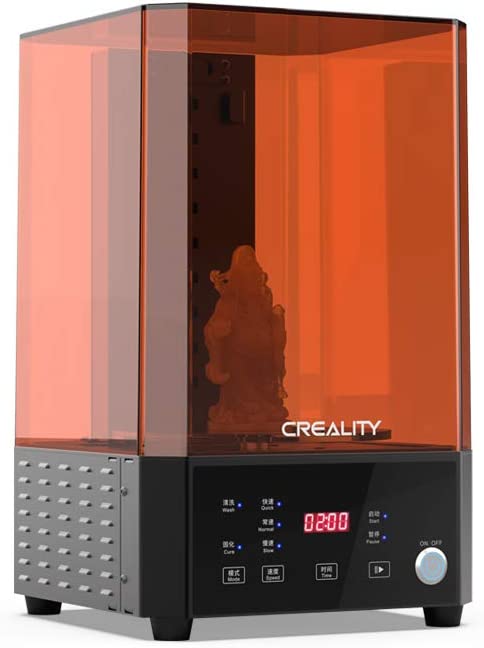
Creality Washing And Curing Machine
A cheaper alternative to the Anycubic wash and cure station, with a slightly larger volume than the standard (not plus) Anycubic model.
It only got one line of UV LEDs and features a somewhat weird UI that makes it more complex than it have to.
Like the Anycubic, this one also got an interchangable cover which saves deskspace.
You can find it for around $150 on amazon here
I hope this gives you a better insight what is available and helps you get started on your 3D printing journey, no matter if its for larger wargames like Warhammer, Dungeons and Dragons or really cool sculpts.